


How to Build an Indoor Sauna: DIY Tips From Pro Sauna Builders
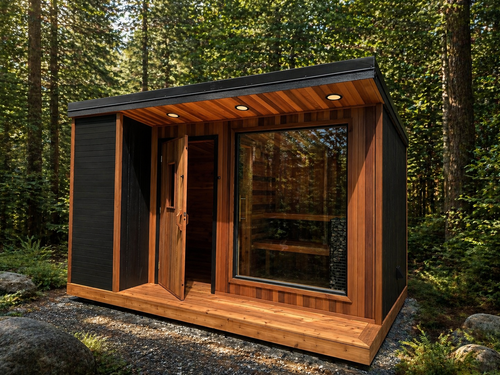
An indoor sauna turns an ordinary room into a space where you can slow down, warm up, and reset. It gives you the same deep heat and calm you’d find in a spa, only steps from where you live and unwind.
If you’re planning to build one yourself or with the assistance of a professional, this guide walks you through everything you need to know for your indoor sauna to feel solid, safe, and built to last.
How to Build a Sauna Indoors: What You Need Before You Start
Building an indoor sauna begins long before the first board goes up. A good plan saves time, prevents mistakes, and keeps your home safe. These are the essentials to sort out before any construction begins.
Choose the perfect location indoors
Indoor saunas can live in more places than most people expect. Basements, spare bedrooms, large bathrooms, garages, and converted closets all work as long as the space can handle heat and moisture.
Look for:
-
Enough room for benches and ventilation
-
A level floor that supports the sauna’s weight
-
A nearby electrical source
-
A space that isn’t prone to heavy humidity or leaks
Most homeowners choose a corner of a basement or an unused room because the airflow is easier to manage and the structure stays stable year-round.
Understand structural requirements
A sauna doesn’t need a full remodel, but it does require a solid foundation. The floor must support the combined weight of the sauna, the heater, and the people using it. Walls need room for insulation, and ceiling height should be comfortable for both standing and sitting.
Clearances matter as well (especially around the heater), so the space must allow the heater to operate safely without touching nearby surfaces.
Permits and codes
Some builds require permits when adding new electrical circuits or modifying ventilation. Indoor projects often follow stricter rules because you’re working in an enclosed space.
At minimum, a licensed electrician should handle:
-
Dedicated circuits for the heater
-
Breaker installation
-
Any rewiring needed to support the DIY sauna
Getting this part right ensures your sauna heats evenly, safely, and without tripping circuits.
What Materials You Need to Build an Indoor Sauna
The materials you choose determine how your sauna looks, feels, and performs. Using the right wood, insulation, and hardware protects your home from moisture and keeps heat consistent. Importantly, it ensures the sauna ages gracefully.
Here’s what belongs inside an indoor sauna.
Wood selection
Clear Western Red Cedar is the gold standard for in-home saunas. It stays cool enough to sit on, smells incredible when warmed, and naturally resists moisture, mildew, and rot. Cedar also expands and contracts without cracking, which makes it ideal for the constant temperature swings of a sauna.
Other woods can work, like hemlock, aspen, or alder, but none match cedar’s aroma, durability, or long-term stability. Avoid pressure-treated wood entirely. Its chemicals release fumes under heat and are never safe inside a sauna.
Insulation and vapor barriers
Insulation makes the sauna efficient. Mineral wool is the preferred choice because it handles heat well, won’t sag inside walls, and keeps temperatures steady. Once insulation is in place, it must be covered with a foil-faced vapor barrier.
This reflective layer does two things at once: it stops moisture from entering your walls and rebounds heat back into the sauna.
Tape every seam carefully. Gaps lead to heat loss, condensation, and long-term structural problems.
Flooring options
Sauna floors shouldn’t trap moisture. Most indoor saunas sit on tile, sealed concrete, or another waterproof surface. A cedar duckboard or mat goes on top to keep your feet off the cold floor and allow water to drain and evaporate.
Things to avoid:
-
Vinyl flooring (it melts and off-gasses under heat)
-
Carpet (holds moisture, breeds mold)
-
Bare wood floors (warp risk and poor hygiene)
A stable, waterproof foundation makes the entire room easier to maintain.
Hardware and fasteners
Use stainless steel screws and hardware only. Anything else will rust, stain the cedar, and weaken over time. Inside the sauna, keep metal exposure minimal. Metal conducts heat quickly and becomes dangerously hot, so screws should be recessed or hidden behind paneling.
Step-by-Step: How to Build an Indoor Sauna

Once the planning and materials are in place, the build itself follows a clear rhythm. Each step builds on the last, creating a space that’s safe, efficient, and comfortable to sit in for years. Here’s the full walkthrough.
Step 1: Frame the walls and ceiling
Start with a simple wood frame using standard 2×4 or 2×6 studs. Leave space for insulation, wiring, and airflow. If you’re planning upper and lower benches, add reinforcement where those supports will attach. Framing doesn’t need to be complicated. It just needs to be solid and square so the cedar paneling installs cleanly.
Step 2: Install electrical and heater support
Before any insulation goes in, run the wiring. A sauna heater requires its own dedicated circuit, and indoor saunas often include lighting, a control panel, or a WiFi controller. A licensed electrician should handle this part to keep everything safe and code-compliant.
If your heater mounts on the wall, install blocking now so it has a secure anchor point.
Step 3: Insulate the walls properly
Once electrical is complete, fill each wall and ceiling cavity with mineral wool insulation. It’s heat-tolerant, moisture-resistant, and quieter than foam. Pack it snugly without crushing it. Air pockets help with heat retention.
Step 4: Install the vapor barrier
Cover the insulated walls with foil-faced vapor barrier, shiny side in. Overlap seams by a few inches and tape them tightly. The foil reflects heat back into the room, which helps the sauna warm up faster and stay hot with less energy. Just as important, the barrier keeps moisture from entering your home’s framing.
Step 5: Add cedar interior paneling
Now comes the part that makes your sauna look like a sauna.
Install tongue-and-groove cedar boards horizontally or vertically depending on the aesthetic you want. Fit boards snugly, tap them into place gently, and keep fasteners hidden for a clean finish. Leave a small gap at the bottom to allow air circulation behind the walls.
Step 6: Build and install benches
Sauna benches usually come in two levels: a higher bench for full heat and a lower bench for moderation. Use clear cedar for comfort and longevity. Round the edges so they’re easy on the legs and avoid exposed screws where skin might touch. Make sure the upper bench is solidly supported as it carries the most weight.
Step 7: Set up ventilation
Good ventilation prevents stuffiness and helps heat circulate evenly. A common setup includes:
-
An intake vent near the heater (low on the wall)
-
An exhaust vent on the opposite wall, closer to the ceiling
Home saunas especially benefit from a passive but steady airflow, which keeps oxygen fresh and humidity manageable.
Step 8: Install the heater
Follow the manufacturer’s clearance requirements down to the inch. Load the stones properly; not too tight, not too loose. If you’re using a heater with WiFi or a wall-mounted controller, complete those connections now.
Before you run your first session, have your electrician do a final check on the breaker and wiring.
Step 9: Lighting and final checks
Use only sauna-rated lighting fixtures that can handle high heat. Indirect lighting behind a backrest or beneath a bench creates a calm glow without harsh shadows.
Give the entire room a once-over to confirm:
-
Vents are open
-
Cedar is clean and dry
-
Heater is secure
-
Electrical components look tidy
Then fire up the sauna for a low-heat “dry run” to warm the wood and check for any unusual smells or issues.
Common Mistakes to Avoid When Building an Indoor Sauna
Indoor saunas are forgiving once they’re built, but the building process leaves little room for shortcuts. These are the mistakes that cause problems later + the ones that are easiest to avoid with the right approach.
Poor ventilation planning
Ventilation is NOT optional indoors.
Without it, the sauna feels stale, humidity builds faster than the room can handle, and fresh oxygen never flows in. Some homeowners skip vents entirely, assuming the heater will circulate enough air. It won’t.
A simple intake-and-exhaust setup is the backbone of a healthy, long-lasting sauna.
Incorrect vapor barrier installation
The vapor barrier does more than trap heat; it protects your home’s framing from moisture. When seams are left open or tape is skipped, condensation forms inside the walls. Over time, that leads to mold or warped framing.
Overlapping seams and taping everything tightly is a small task with major long-term impact.
Using the wrong wood inside the sauna
This is one of the biggest and most common mistakes. Pressure-treated wood releases chemicals when heated. Pine can ooze resin. Oak overheats and scorches. Cedar, alder, hemlock, or aspen are the safe choices, and cedar is the clear leader for comfort and durability.
Improper heater size or placement
A heater that’s too small struggles to heat the sauna room. One that’s too large burns energy and overheats the space unevenly. Mistakes happen when people guess heater size instead of calculating sauna volume or accounting for extra glass.
Placement is also important as mounting it too close to a wall or bench is unsafe and reduces airflow.
Skipping professional electrical work
Sauna heaters draw a lot of power, and they need their own dedicated breaker. DIY electrical shortcuts lead to tripped circuits, overheated wires, or worse.
Hiring an electrician for the heater wiring is a must.
Neglecting moisture management in the room around the sauna
Even though the sauna is enclosed, steam can escape when the door opens or closes. If the surrounding room isn’t prepared for humidity, paint peels, trim warps, and floors suffer.
A small exhaust fan or dehumidifier outside the sauna often solves this problem.
Ready to Build Your Indoor Sauna? Start Your Plan Today
An indoor sauna becomes one of the most reliable rituals in your home. With the right materials, layout, and care, it offers years of calm, steady heat, and a place to reset whenever you need it.
If you’re ready to explore a kit, a custom build, or want guidance choosing the right heater and layout, our team can help map out the next steps.


